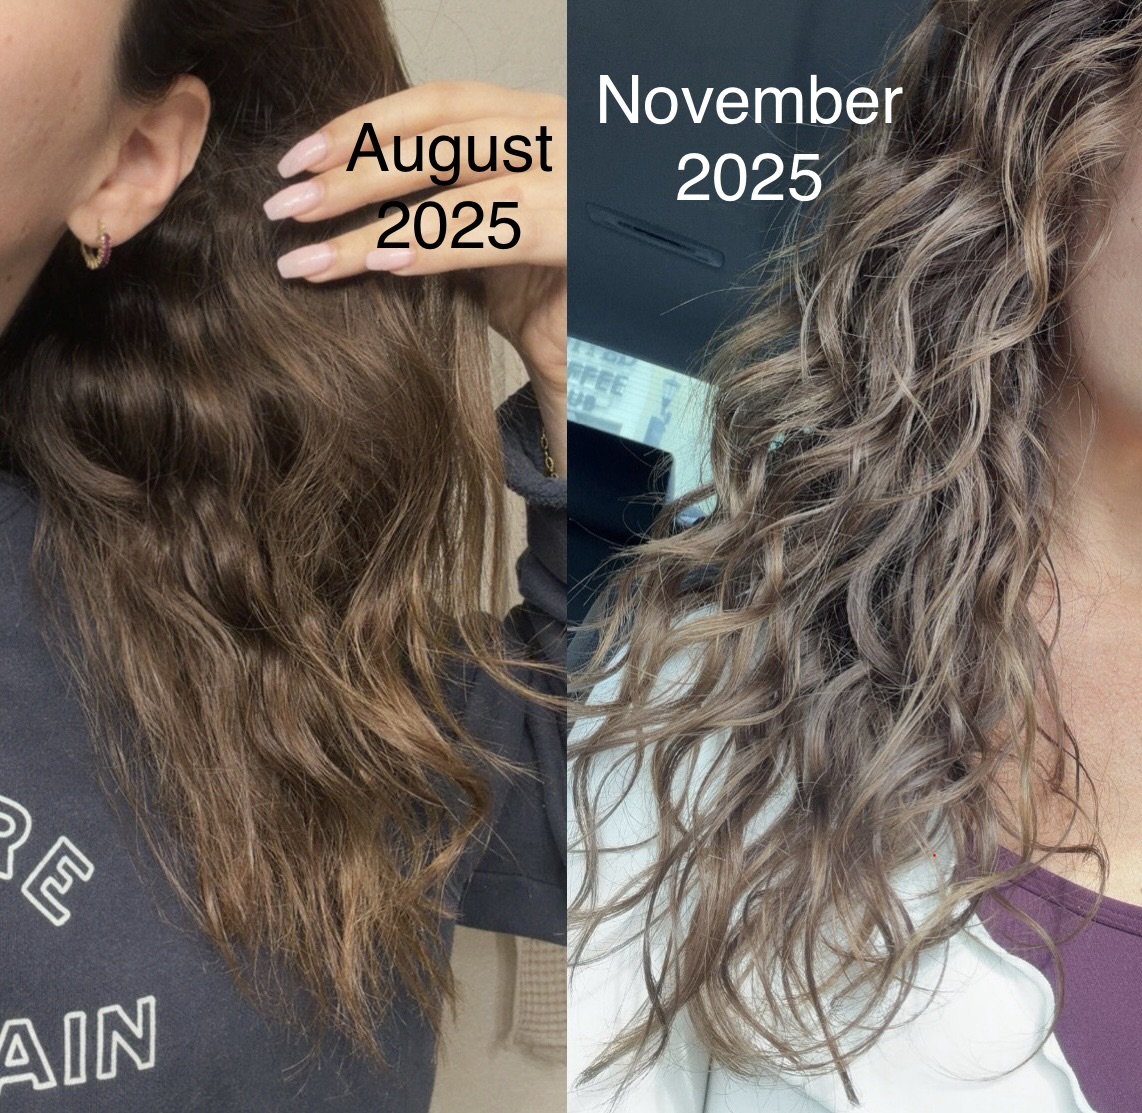
The Good Curl Edit:
How I Curl Trained My Hair.
The Good Hair Club, Natural Curls Edition
If you've ever looked up a curly hair routine and found a 14-product, three hour wash day, you're not alone. Natural curls have a reputation for being high maintenance. But caring for them doesn't have to be overwhelming or time consuming.
Over the past five months, I've been curl training my own hair: building simple, consistent habits that help my natural curl pattern show up stronger, healthier, and more defined. No complicated rules, no endless product shelf. Just a handful of steps that actually fit into real life, even in the Tampa humidity.
Here's exactly what I did, step by step.
Quick note: some links in this post are affiliate links. If you buy through them, I may earn a small commission at no extra cost to you.
Step 1: Filter your shower water
The first change I made had nothing to do with styling. It was my water.
Most tap water is treated with chlorine or chloramine to keep it safe, which is not so great for curls. Over time, those chemicals can leave hair dry, rough, and dull, which makes curls frizzy and harder to define. A shower filter takes them out before they ever touch your hair.
I use Filterbaby. Its filter uses activated carbon fiber to remove up to 99% of chlorine and chloramine, plus certain heavy metals, and a pleated layer that traps tiny particles like rust and dirt. It installs in minutes, and you swap the refill every 90 days. Softer, shinier hair is the payoff, and your skin gets the upgrade, too. I have the automatic 90 day subscription to make sure I always have my new filters when I need them.
Step 2: Cut off the dead ends
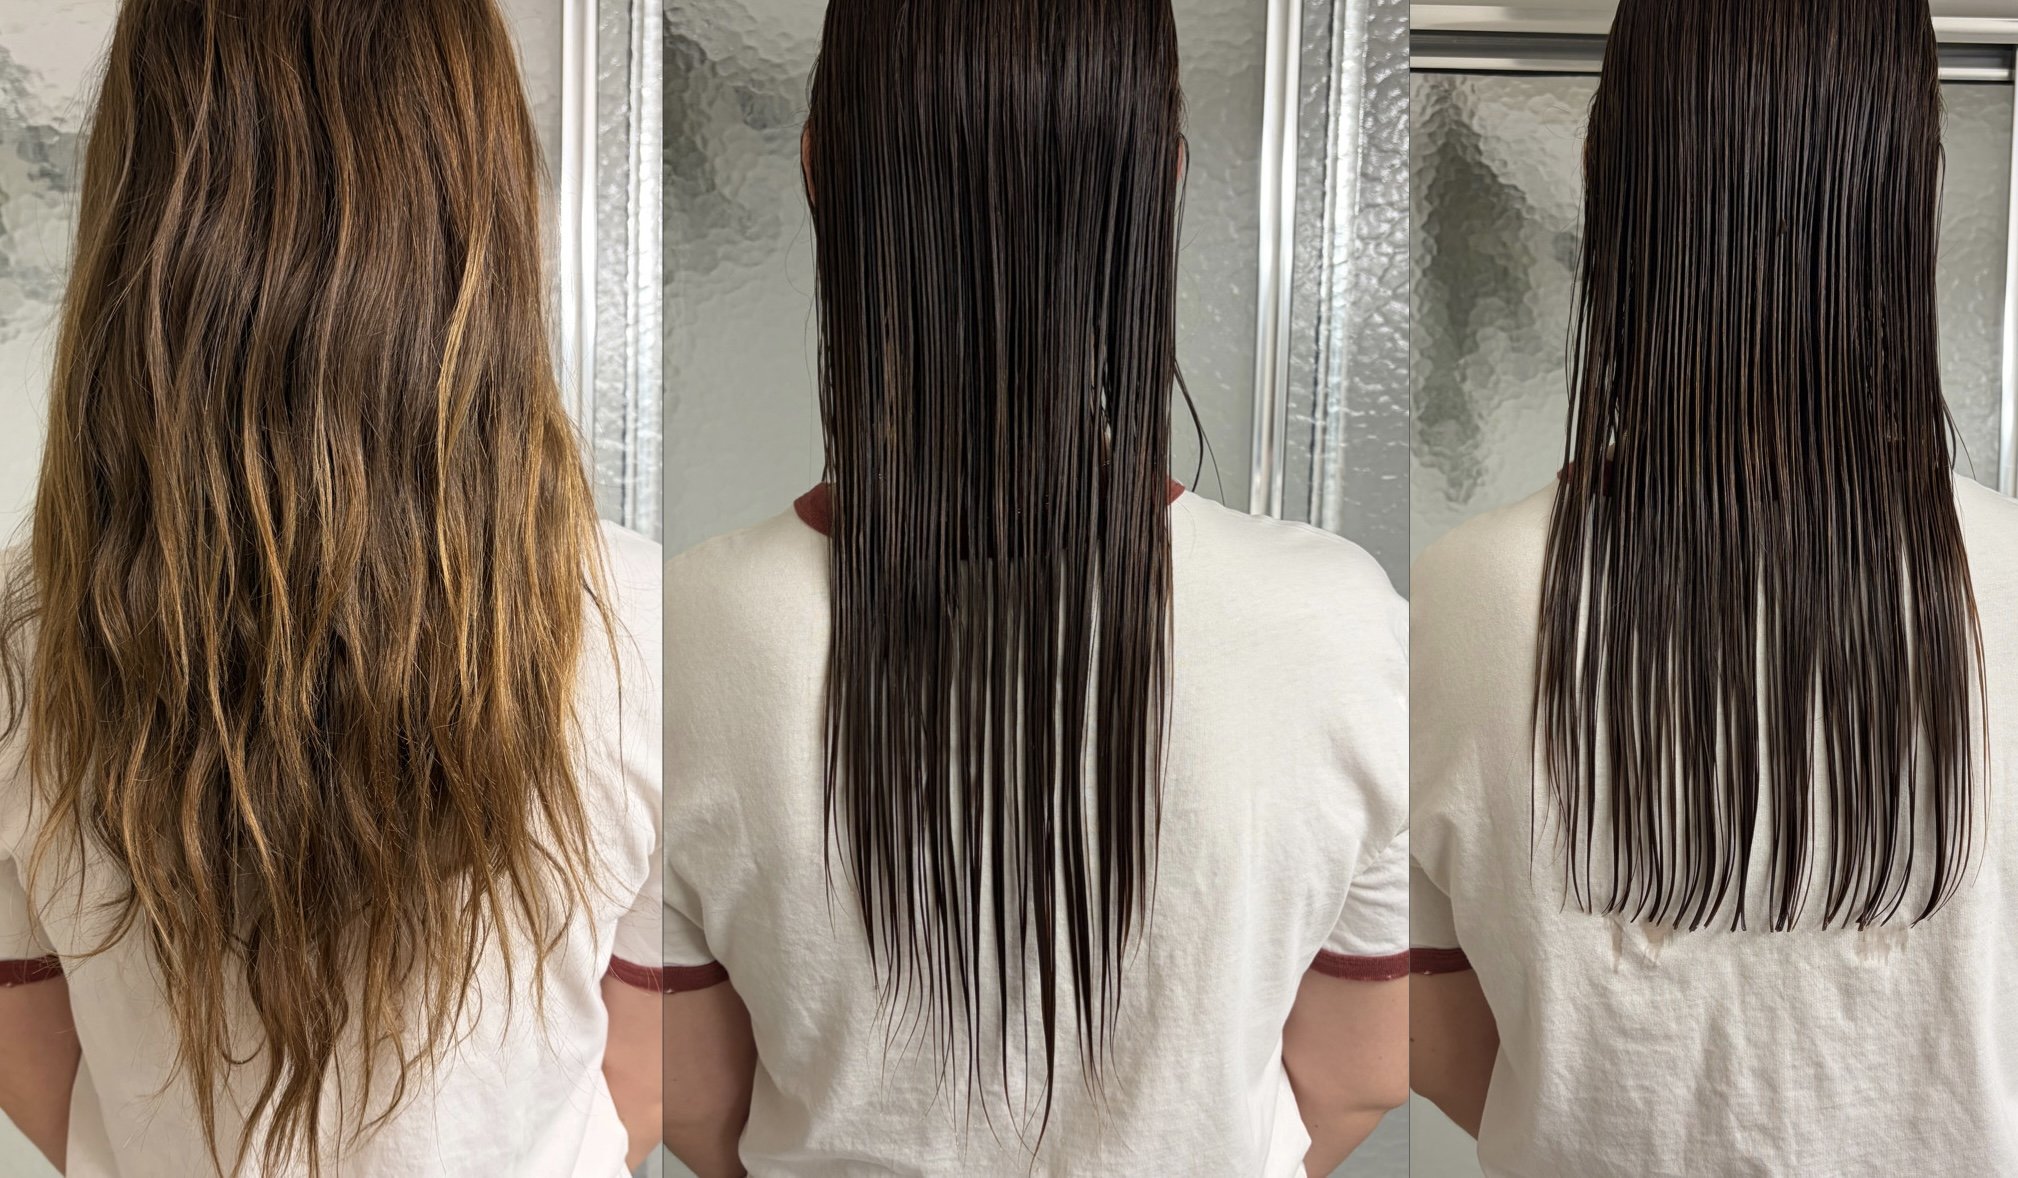
This is the step nobody wants to hear, but it's the one that makes the biggest difference: if your ends are damaged, they will stay straight no matter what you put on them.
A split end is exactly what it sounds like. The protective outer layer of the hair, the cuticle, wears away at the tip until the strand frays and splits in two. Damaged ends can't hold a curl pattern (naturally or styled), so they hang limp and stringy while the rest of your hair curls.
Here's the catch: a split end doesn't stay at the end. Left alone, the split keeps traveling up the hair shaft, damaging more and more of the strand. And there is no product that can glue a split end back together. Some can temporarily smooth it over, but the only real fix is cutting it off.
So book the trim (yes, a trim is the same thing as a cut). Your curls will begin to bounce back the moment that dead weight is gone.
Step 3: Oil your ends and protect your hair at night
Every night, I apply a little hair oil from the mid-lengths to the ends, then sleep in a bonnet on a silk or satin pillowcase.
Here's what that combination is doing:
The oil seals in moisture. It coats the strand, helping it hold onto hydration and adding slip so strands don't snag on each other.
The bonnet keeps curls in place. Your hair stays contained, so you wake up with curls intact instead of a crushed, tangled mess.
Silk and satin reduce friction. Cotton pillowcases grip hair and soak up moisture as you toss and turn, which leads to frizz and breakage. Smooth fabrics let hair glide instead.
Bonus: a silk or satin pillowcase is a backup on nights the bonnet slips off. (It happens to the best of us.)
Step 4: Keep your wash routine simple
My wash routine has just two modes:
Every other week: clarify, then condition. Use a clarifying shampoo once every other week, followed by a conditioning treatment. Clarifying removes the buildup from products, oils, and water that weighs curls down and keeps them from forming. Because it's such a deep clean, following up with a conditioning treatment puts moisture back in.
Every other wash: lightweight and volumizing. Wash with a lightweight volumizing shampoo and conditioner. Heavy formulas can flatten curls, while lightweight ones keep them springy.
Step 5: Apply your styling products to wet hair
This is where the magic happens, and it only takes three products, applied while your hair is still wet.
IGK Good Behavior 4-in-1 Prep Spray. This is my first layer. It detangles, protects against heat up to 450°F, controls frizz for up to 24 hours, and adds shine. For curls, that means easier detangling with less breakage, protection before you diffuse, and a frizz-fighting base layer for everything that follows.
IGK Class of '93 Curl Perfecting Whipped Cream. Flip your hair over and scrunch it in. This silicone-free curl cream works as both a leave-in conditioner and a curl-defining styler, packed with 10 butters and oils that seal in moisture and enhance definition without weighing curls down.
IGK Rich Kid Coconut Oil Styler. Scrunch this in next. It's a coconut oil-infused gel-cream with a soft, flexible hold that locks in your curl shape. The coconut oil helps keep hair moisturized and adds shine.
How to scrunch so every curl gets product: Flip your head upside down, then move your head and hair around as you go: tip to one side, then the other, then back upright. Cup sections of hair in your palms and squeeze upward toward your scalp. Work all the way around your head, including the back and underneath, so every section gets an even amount of product. Even distribution means even curls, with no frizzy patches or limp sections.
Step 6: Diffuse on low
A diffuser attachment spreads your dryer's airflow so it dries curls without blowing them apart. A few best practices:
Low heat, low speed. High heat and strong airflow cause frizz. Keep it gentle.
Cup, don't rake. Gently place sections of hair in the diffuser bowl, bring it up toward your scalp, and hold it there for 30 seconds or so. Then lower it and move to the next section.
Flip for volume. Diffusing with your head tipped to each side or upside down lifts the roots.
Hands off. Resist touching or fluffing your curls while they dry. Every touch invites frizz.
Go all the way, or most of the way. Diffuse until your hair is fully dry, or most of the way dry, then let it air dry the rest of the way.
Step 7: Scrunch out the crunch
Once your hair is completely dry, it may feel a little stiff. That's called a cast: the hold from your styling products, keeping curls in shape while they dry. It's a good sign.
To break it, rub a few drops of a lightweight hair oil between your palms and gently scrunch your curls until the stiffness is gone. You're left with soft, touchable, defined curls.
Step 8: Revive your curls the next day
After a night in your bonnet, your curls may look a little flat, frizzy, or out of shape. No need to rewash. A quick refresh brings them right back.
My go-to is amika Power Hour Curl Refreshing Spray. It's a lightweight spray that revives and moisturizes waves, curls, and coils, with a soft hold that redefines your curl shape and fights frizz, all without a full wash day.
Here's how to use it:
Spritz it evenly through dry hair, focusing on any flat or frizzy sections.
Tip your head forward and scrunch your curls upward toward your scalp.
Let it set for a minute, then flip your hair back and go.
Need another boost later in the day? Spritz and scrunch again whenever your curls need a little love.
The bottom line
Curl training isn't about perfection or a 20 step routine. It's about a few consistent habits: clean water, healthy ends, nighttime protection, a simple wash routine, the right products, and a gentle diffuse. Give it a few months, and your curls will thank you.
Getting married and planning to wear your natural curls on the big day? I'd love to help you plan a style that celebrates your texture.
Xo, Becki